This post may contain affiliate links. Please read our disclosure policy.
If you’ve only had pad Thai from takeout, there’s a good chance you’ve never had it done right.
Because real pad Thai isn’t just sweet noodles with chicken tossed in.
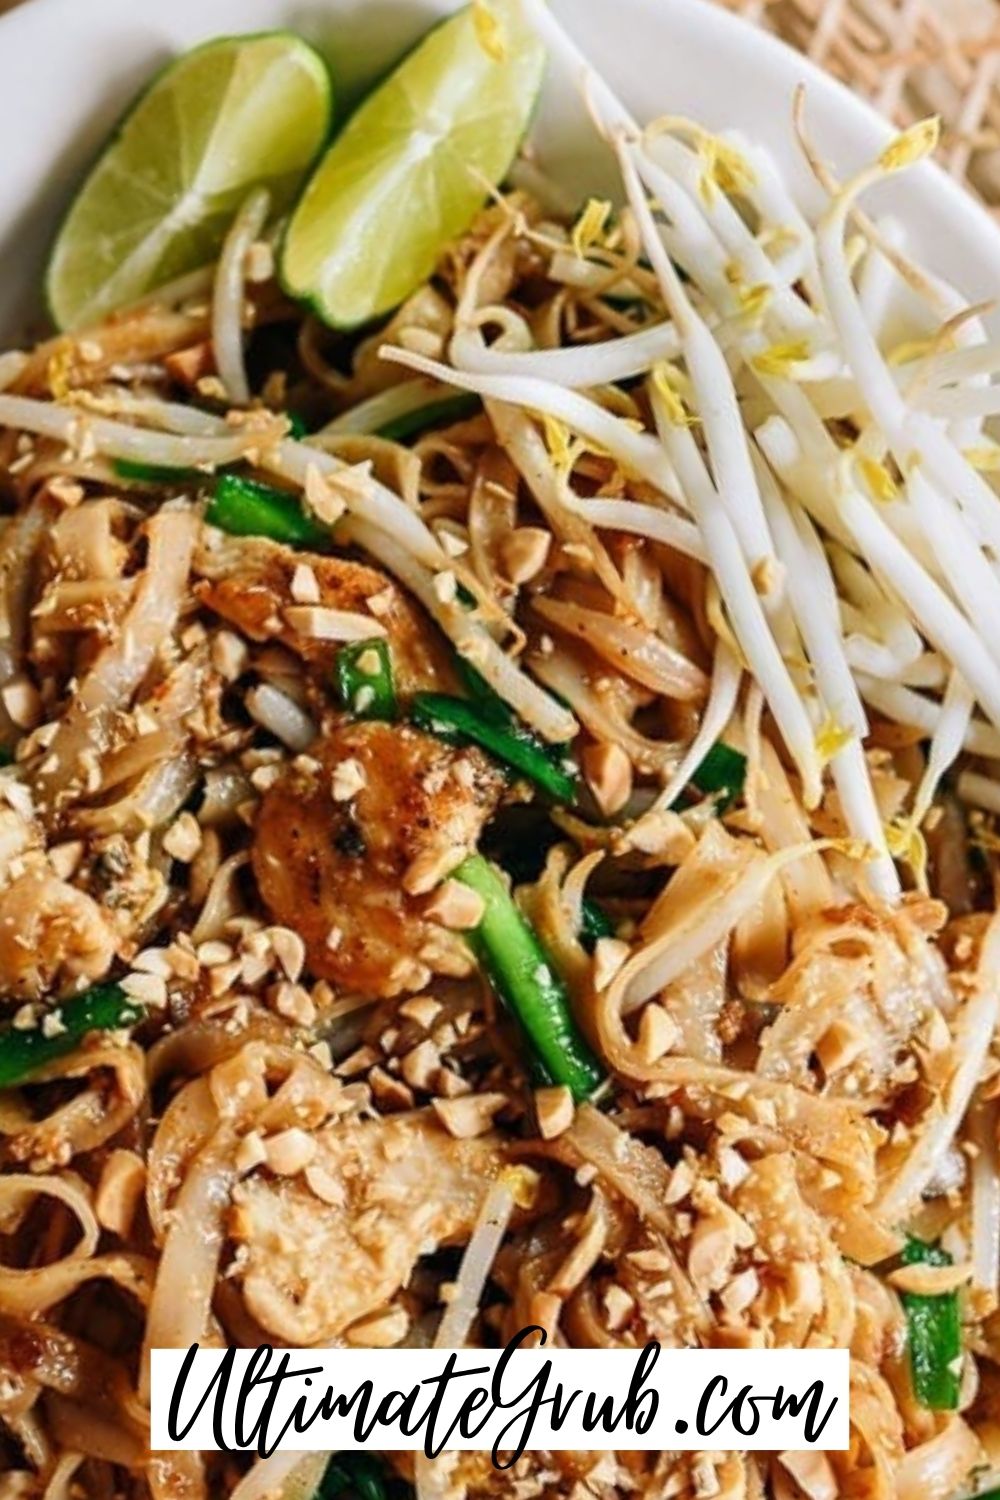
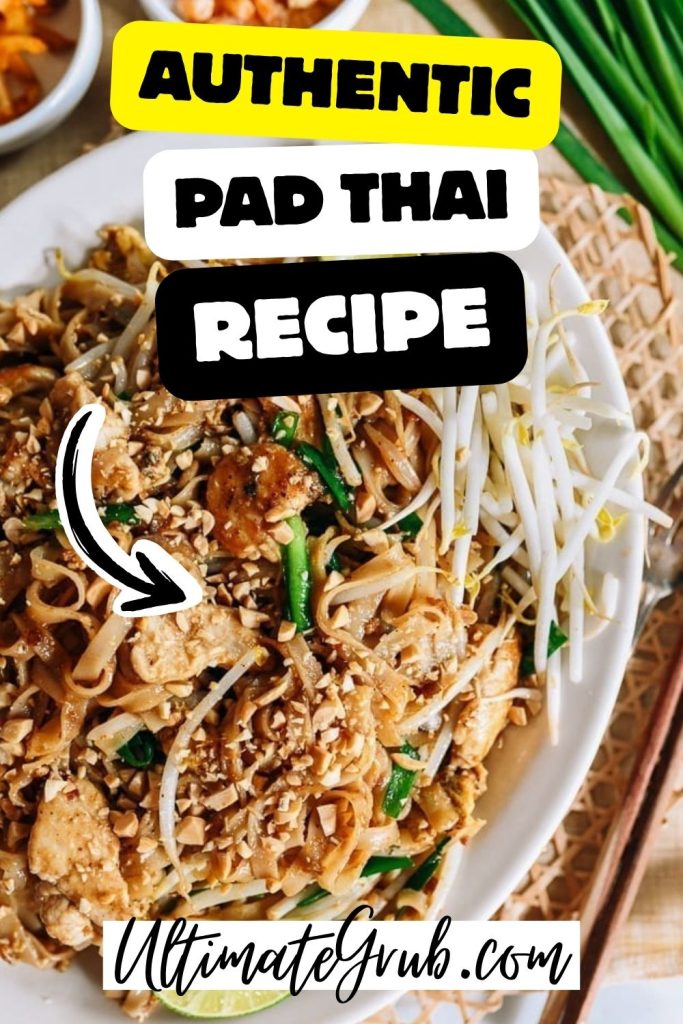
It’s balanced. It’s layered. It’s slightly tangy from tamarind, salty from fish sauce, just sweet enough to round it out—and built with textures that actually make every bite different.
You’ve got chewy noodles, tender chicken, soft scrambled egg, crunchy bean sprouts, and peanuts bringing it all together.
And here’s the truth…
This dish moves fast—but it’s not complicated.
You just need to understand what’s happening at each step.
Once you do?
You’re not ordering this anymore—you’re making it better at home.
Why You’ll Love This Chicken Pad Thai
This recipe works because it doesn’t skip the real ingredients.
The sauce isn’t fake sweet—it’s built from tamarind, fish sauce, and sugar, which gives you that authentic sweet-tangy-salty balance that pad Thai is known for.
The noodles aren’t overcooked or mushy.
They’re softened just enough before hitting the pan, then finished in the sauce so they absorb flavor instead of just sitting in it.
And the textures?
That’s what makes this dish.
Soft eggs, crisp sprouts, tender chicken, chewy noodles, crunchy peanuts—it all works together so every bite actually feels different.
That’s what separates good pad Thai from forgettable pad Thai.
What You’ll Need
Before you start cooking, you need to understand this: Pad Thai is about preparation.
Once the heat is on, everything happens fast.
That means everything needs to be ready before you start.
The sauce is the backbone.
If that’s off, the whole dish is off. You’re balancing sweet, salty, tangy, and a little depth from soy sauce.
The noodles need to be softened—not fully cooked.
If you over-soak them, they fall apart later. If you under-soak them, they won’t cook properly in the pan.
The chicken needs to be sliced thin and marinated briefly so it stays tender and cooks quickly.
And everything else—garlic, shallots, dried shrimp, eggs, sprouts—needs to be prepped and ready to go.
Because once you start cooking?
You’re not stopping.
Tools for This Recipe
Ingredients for Chicken Pad Thai
This is where everything comes together.
It might look like a long list—but each ingredient is doing something important.
For the Pad Thai Sauce:
- 1.5 ounces tamarind pulp + 1/2 cup boiling water
- 3 tablespoons palm sugar (or dark brown sugar)
- 3 tablespoons fish sauce
- 2 tablespoons Thai black soy sauce
- 1 teaspoon Thai sweet soy sauce (optional)
- 1/4 teaspoon white pepper
For the Dish:
- 8 ounces dried Pad Thai rice noodles
- 8 ounces chicken breast, thinly sliced
- 1 teaspoon Thai thin soy sauce
- 1 teaspoon cornstarch
- 1 teaspoon water
- 1/4 cup dried shrimp, minced
- 3 cloves garlic, sliced
- 2 large shallots, thinly sliced
- 2 tablespoons preserved salted radish (optional)
- 3 large eggs, beaten
- 2 cups mung bean sprouts
- 1 cup garlic chives
- 2 tablespoons roasted peanuts, chopped
- 6 tablespoons vegetable oil
- Lime wedges for serving
How to Make Chicken Pad Thai

Start by making the sauce.
Take your tamarind pulp and pour 1/2 cup of boiling water over it. Let it sit for a minute to soften, then break it apart with a spoon or your fingers. Once it’s loosened up, press it through a fine strainer to separate the liquid from the solids.
What you’re left with is your tamarind concentrate.
Now add the palm sugar, fish sauce, black soy sauce, sweet soy sauce (if using), and white pepper. Stir everything together until the sugar dissolves completely. Set this aside—this is your flavor base.
Next, prepare your noodles.
Soak the dried rice noodles in hot water for about 20 minutes. You’re not cooking them fully here—you’re just softening them so they finish cooking in the pan later. Once they’re flexible but still slightly firm, drain them well.
If the noodles are very long, cut them into shorter lengths. This makes stir-frying much easier and keeps everything from clumping together.
Now marinate the chicken.
In a bowl, combine the sliced chicken with Thai thin soy sauce, cornstarch, and water. Mix until evenly coated and let it sit while you prep everything else. This step helps keep the chicken tender and gives it a better texture when cooked.
Now prep everything else.
Mince the dried shrimp into a coarse texture. Slice your garlic and shallots. Get your eggs beaten and ready. Wash and drain the bean sprouts. Cut the chives. Chop the peanuts.
This is important.
Once you start cooking, you won’t have time to prep anything.
Now heat your wok over high heat and add 2 tablespoons of oil.
Once the oil is hot and just starting to smoke, add the chicken. Spread it out and let it sear without moving it too much at first. This helps it develop some color instead of just steaming.
Cook until the chicken is just done, then remove it from the pan and set it aside.
Add another 3 tablespoons of oil to the wok.
Lower the heat slightly and add the dried shrimp. Stir-fry for about 2 minutes until fragrant and slightly crisp. This builds a deep, savory base.
Add the garlic and cook for about 30 seconds.
Then add the shallots and preserved radish. Stir-fry for another 30 seconds until everything starts to soften and release flavor.
Now turn the heat back up to high.
Add the noodles and pour in the sauce. Use your spatula to lift and separate the noodles so they cook evenly and absorb the sauce.
This step takes a little patience.
Keep tossing and spreading the noodles so they don’t clump together and everything gets coated.
Now create a space in the pan by pushing the noodles to one side.
Add a small amount of oil to the empty space and pour in the beaten eggs. Let them set slightly, then gently scramble them without breaking them into tiny pieces.
When the eggs are about 70% cooked, mix them into the noodles.
Now add the bean sprouts and chives.
Toss everything together quickly so the chives wilt slightly but the sprouts stay crisp.
Add the chicken back into the pan.
Stir everything together until fully combined and heated through.
Remove from heat and plate immediately.
Top with chopped peanuts and serve with lime wedges.
Substitutions & Variations
You can adjust this—but don’t lose the balance.
You can swap chicken for shrimp or tofu. You can skip the dried shrimp if needed, but you’ll lose some depth.
If you can’t find palm sugar, brown sugar works fine.
Just don’t skip the tamarind—that’s what makes pad Thai taste like pad Thai.
What to Serve With Pad Thai
This is a full meal on its own.
If you want sides, keep them simple—spring rolls or a light soup work well.
Or just serve it as-is and let it shine.
Leftovers & Storage
Store leftovers in an airtight container in the fridge for up to 3 days.
Reheat in a skillet if possible to bring back some texture. Add a splash of water if the noodles dry out.
FAQs
Why does my pad Thai taste too sweet?
You likely used too much sugar or not enough fish sauce or tamarind.
Pad Thai should be balanced. If it’s too sweet, adjust with more fish sauce or a little extra lime juice to bring it back.
Why are my noodles mushy?
They were over-soaked or overcooked.
You want them softened before cooking—not fully cooked. They finish cooking in the pan.
Can I skip the fish sauce?
You can—but you lose authenticity.
Fish sauce adds depth and saltiness that’s hard to replace. Without it, the dish will taste flatter.
Why is my pad Thai sticking together?
You’re not separating the noodles enough while cooking.
Use your spatula to lift and toss them regularly so they don’t clump.
Can I make this ahead of time?
You can—but it’s best fresh.
The texture of the noodles and sprouts is at its best right after cooking.
Final Thoughts
This is one of those dishes that proves simple doesn’t mean basic.
It’s bold, balanced, and packed with texture and flavor when done right.
And once you understand how it works?
You’ll never look at takeout pad Thai the same way again.

