This post may contain affiliate links. Please read our disclosure policy.
If you’ve ever wanted to make real sourdough bread—the kind with that deep flavor, chewy texture, and slightly tangy bite—it starts with this simple sourdough starter recipe.
Literally.
Because a sourdough starter isn’t just an ingredient…
It’s alive.
You’re building a mixture of flour and water that captures wild yeast and beneficial bacteria from the environment. Over time, it ferments, grows, and turns into something you can use to make bread, pancakes, English muffins—whatever you want.
And yeah… it sounds a little intimidating at first.
But here’s the truth.
It’s not complicated.
It just takes a little patience.
You’re feeding it, letting it sit, and repeating the process over a few days until it becomes active and strong enough to bake with.
By the end of it?
You’ve got something you can keep going for years.
Simple ingredients. A little time. And something that turns into way more than it should.
What is Sourdough Starter?
A sourdough starter is a living mixture of flour and water that naturally grows wild yeast and beneficial bacteria.
Instead of using store-bought yeast, this is what makes sourdough bread rise.
When you mix flour and water and let it sit, it starts to capture wild yeast from the environment—from the air, the flour itself, and even your kitchen. At the same time, good bacteria (lactic acid bacteria) begin to grow.
As you feed it over several days, those microorganisms multiply.
The yeast is what creates gas, which makes dough rise. The bacteria produce acids, which give sourdough its signature tangy flavor.
That’s why sourdough tastes different from regular bread—it’s fermented instead of just quickly risen.
Why You’ll Love This Sourdough Starter
This works because it’s simple, reliable, and actually doable—even if you’ve never done anything like this before.
First, the ingredients.
You’re using just flour and water. That’s it. No packets, no shortcuts, no complicated steps. You’re letting nature do the work, and it shows in the final flavor.
Then the process.
It’s repetitive—but in a good way. You mix, discard, feed, and repeat. Each day builds on the last, and you can actually see it changing—more bubbles, more rise, more life.
That’s how you know it’s working.
And here’s the real payoff…
Once it’s established, it keeps going.
You don’t just use it once and move on. You can maintain it, feed it, and use it again and again. Bread, pancakes, English muffins—it becomes something you come back to.
And the flavor?
Completely different from anything store-bought.
You get that slightly tangy, deep sourdough flavor that only comes from fermentation done right.
It takes a little patience—but what you end up with is something you made from scratch that keeps giving back.
Simple process. Real results. And it just gets better over time.
What Are the Health Benefits of Sourdough?
Sourdough isn’t just about flavor—there are some real benefits that come from the way it’s made.
First, it’s easier to digest.
Because sourdough is fermented, the yeast and bacteria start breaking down parts of the flour before you even eat it. This includes things like gluten and certain starches, which can make sourdough gentler on your stomach compared to regular bread for many people.
Now, that doesn’t make it gluten-free—but it can feel easier to handle for some.
Next, better nutrient absorption.
Grains naturally contain compounds called phytates, which can block your body from absorbing minerals like iron, zinc, and magnesium. The fermentation process in sourdough helps break those down, making it easier for your body to actually use the nutrients in the bread.
Then there’s blood sugar.
Sourdough tends to have a lower glycemic impact compared to regular white bread. That means it can cause a slower rise in blood sugar instead of a sharp spike and crash.
And finally—the fermentation itself.
That long fermentation process creates beneficial compounds and contributes to gut-friendly bacteria. While the baking process kills most live cultures, the byproducts of fermentation can still support digestion.
So while it’s still bread…
Sourdough is more than just bread.
It’s fermented, easier to digest, and brings a little more to the table than standard loaves.
What You’ll Need
A clean glass or ceramic bowl or jar so you can easily see what’s happening as it grows and bubbles.
A tea towel or loose cover—you don’t want it sealed airtight, but it still needs protection.
And a little patience—because this one isn’t fast, but it’s worth it.
That’s it—simple setup, just let it do its thing.
Tools for This Recipe
- Glass or ceramic jar
- Spoon or spatula
- Measuring cup
- Tea towel or loose cover
Ingredients for Sourdough Starter
This might be the simplest ingredient list you’ll ever see—but don’t let that fool you.
You’re not just mixing ingredients…
You’re building something that will grow, ferment, and become the base for everything you make with it.
Ingredients For Sourdough Starter:
- 1 cup flour
- 1 cup filtered water
How to Make a Sourdough Starter
This isn’t hard—but it is a process. You’re building something over several days, so consistency matters more than speed.
Start with day one.
In a clean bowl or jar, combine 1 cup of flour and 1 cup of filtered water. Stir it vigorously so everything is fully combined. Scrape down the sides so there are no dry pockets.
Once mixed, cover it with a clean tea towel or a loose lid. You don’t want it airtight—you want airflow while still keeping it protected.
Let it sit at room temperature for 24 hours.
Now day two.
You’ll notice it may look a little different—maybe a few bubbles, maybe not much yet. That’s normal.
Discard about half of the mixture.
Then add another 1 cup of flour and 1 cup of water, and stir it well again. Cover it the same way and let it sit for another 24 hours.
Days three, four, and five follow the same process.
Each day, discard half, add fresh flour and water, stir, and cover. As the days go on, you should start seeing more bubbles and a slightly tangy smell. That means it’s starting to come to life.
Now days six and seven.
At this point, things speed up a bit.
Instead of feeding it every 24 hours, you’ll feed it every 12 hours. So you’ll discard half, add flour and water, stir, and repeat twice a day.
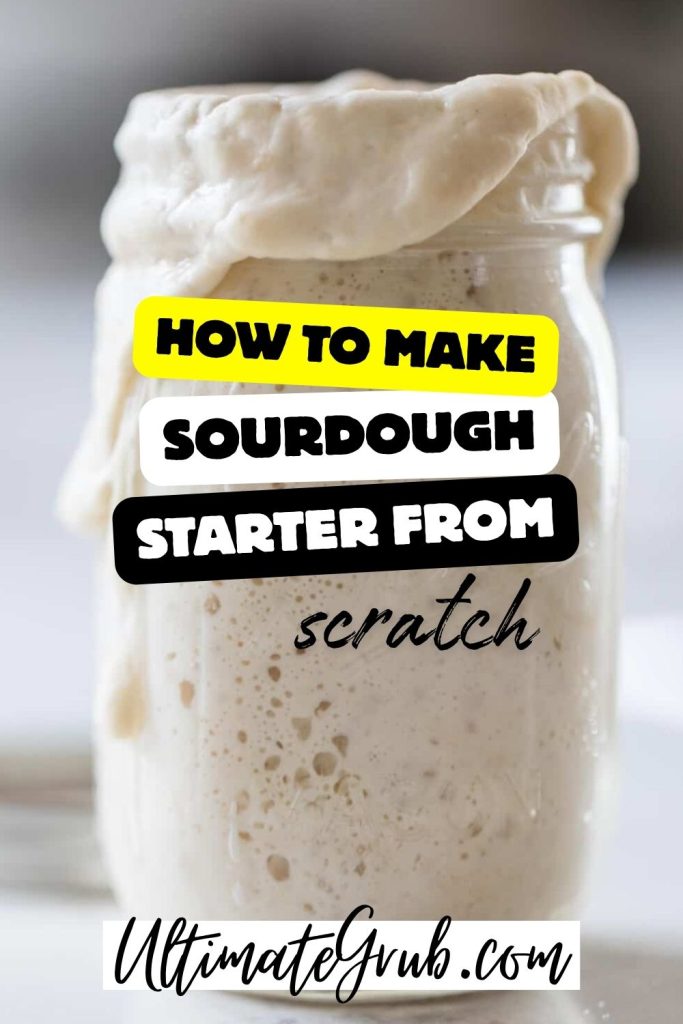
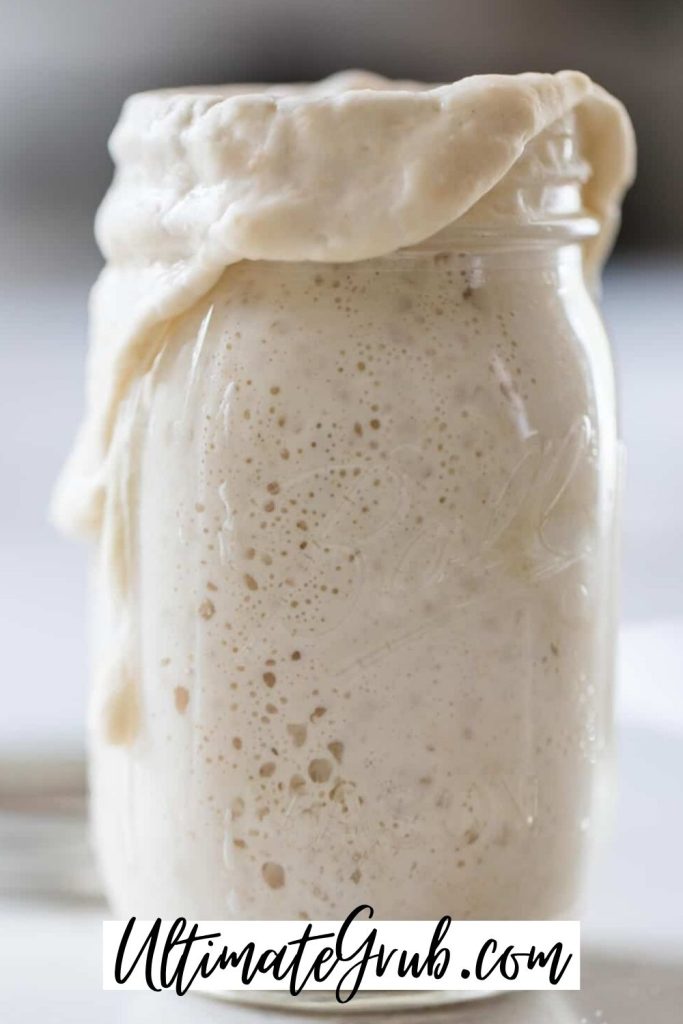
By day seven, your starter should be active.
You’ll know it’s ready if it’s bubbly, slightly tangy-smelling, and doubles in size after feeding. That’s when the wild yeast and bacteria are strong enough to use for baking.
And that’s it.
You’ve gone from flour and water… to something alive and ready to use.
Simple steps—just repeated consistently.
Sourdough Starter Maintenance
Once your starter is active, the goal is simple—keep it alive and ready to use.
How you maintain it depends on how often you plan to bake.
If you’re using it occasionally, the refrigerator is your best option.
Keeping it in the fridge slows everything down, so you only need to feed it about once a week or every other week. When you’re ready to use it, take it out, feed it, and give it time to become bubbly and active again before baking.
If you’re keeping it on the counter, things move faster.
At room temperature, the starter stays active, which means it needs to be fed every day. That also means you’ll need to be using it regularly so it doesn’t build up too much.
For most people, the fridge is the easier option.
It keeps things low maintenance while still giving you a strong, reliable starter whenever you need it.
Either way, the key is consistency.
Feed it regularly, keep it clean, and it can last for years.
Simple care—and it keeps giving back.
FAQs
Why isn’t my sourdough starter bubbling?
This usually comes down to time or environment.
In the early days, it might not look like much is happening—and that’s normal. It can take a few days for the wild yeast and bacteria to really get going. Temperature also plays a big role. If your kitchen is cold, the process will move slower.
Give it time, keep feeding it consistently, and you should start to see bubbles and activity.
Why do I have to discard half each time?
Because your starter would grow out of control if you didn’t.
Discarding keeps the amount manageable and makes sure the new flour and water actually feed the active culture instead of getting diluted. It also helps maintain the right balance so the starter stays strong.
How do I know when my starter is ready to use?
You’re looking for a few signs.
It should be bubbly, slightly tangy-smelling, and able to double in size after feeding. That rise is what tells you the yeast is active enough to bake with.
If it’s not doubling yet, it just needs more time and feeding.
Can I use tap water instead of filtered water?
Sometimes—but it depends.
If your tap water has a lot of chlorine, it can slow down or interfere with the fermentation process. Filtered water is the safer option because it removes those chemicals and gives the starter a better environment to grow.
What should my starter smell like?
It should smell slightly sour or tangy—kind of like yogurt or mild vinegar.
If it smells sharp or unpleasant early on, that can be part of the process. But over time, it should settle into a clean, sour smell. If it smells truly bad or rotten, it’s best to start over.
Final Thoughts
This is one of those things that feels simple—but ends up being something really special.
You start with flour and water, give it time, and suddenly you’ve got something alive that you can use over and over again.
It takes a little patience—but once it’s going?
It opens the door to real sourdough baking whenever you want it.
Simple start. Big payoff.