Braising meat might sound fancy, but trust me, it’s easier than you think. I mean, who doesn’t love a dish that practically cooks itself while you binge-watch your favorite show? Imagine this: a tough cut of meat transformed into a tender, juicy masterpiece. All it takes is some searing, a few aromatics, and a splash of liquid. Ready to reveal those flavors and impress your friends? Let’s explore the magic of braising together, shall we?
Braising Meat: A Cozy Culinary Adventure
Braising meat is like giving your dinner a warm, cozy hug. Seriously, there’s something magical about the process. You start with a tough cut of meat—something like chuck roast or short ribs, which, let’s be honest, aren’t winning any beauty contests, but that’s where the magic lies. Those meat cuts have all the flavor, just waiting to be coaxed out.
First things first, let’s talk about braising techniques. You’ll want to sear the meat in a hot pan until it’s beautifully browned. This step is essential—it’s like giving your meat a tan before it goes on vacation.
Once it’s got that golden crust, remove it from the pan and toss in some aromatics. I love using onions, garlic, and maybe a splash of wine because who doesn’t want a little liquid courage in their cooking? Scrape all those delicious brown bits off the bottom of the pan—those bits are flavor gold.
Next, add your braising liquid. This could be broth, wine, or even a mix of both. Just remember, the liquid should cover about halfway up the meat. You’re not trying to drown it; you’re just giving it a nice spa day.
Return the meat to the pot, cover it, and let it cook low and slow. I use my Dutch oven for this because it’s like a trusty sidekick, always ready to help out. A premium enameled Dutch oven can enhance your braising experience by providing even heat distribution.
After a couple of hours, you’ll want to check on it. The meat should be tender, falling apart like a bad relationship. If it’s not there yet, don’t rush it. Patience is key here.
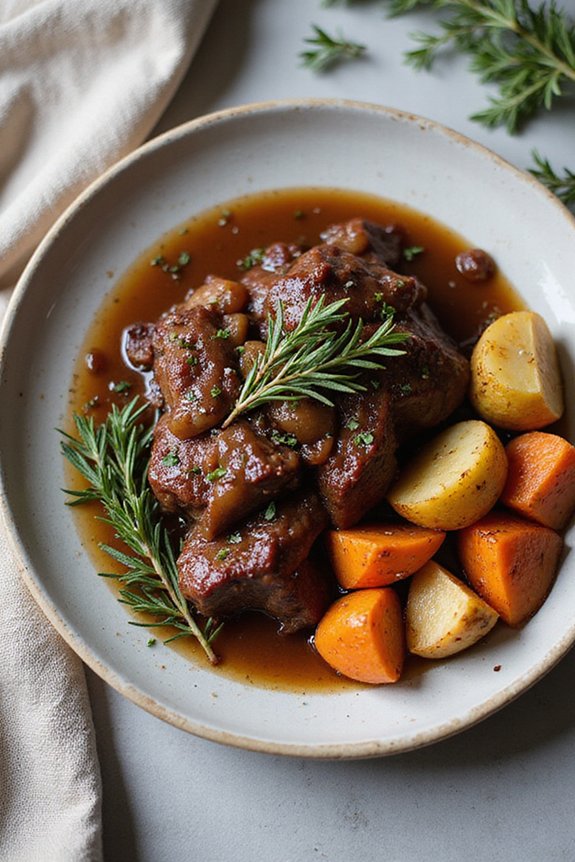
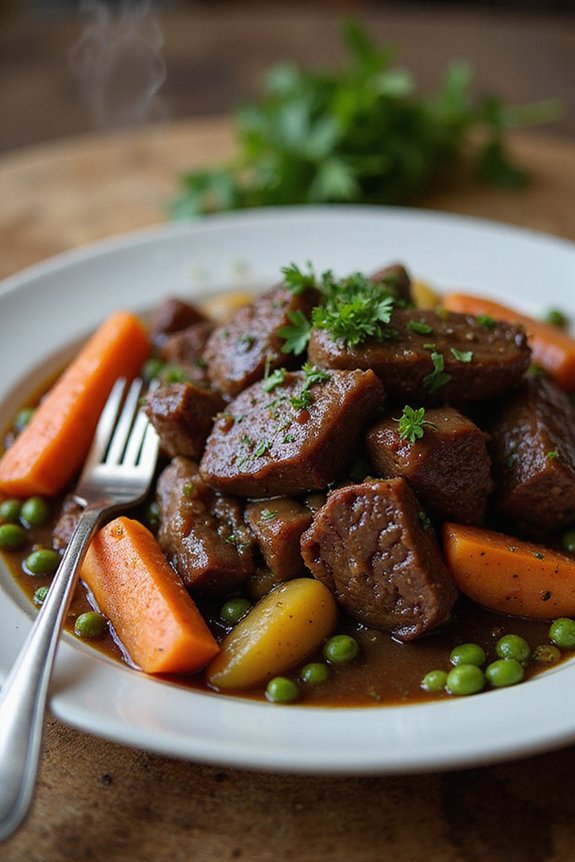
You can serve it with mashed potatoes, rice, or even on its own, reveling in the tender goodness you’ve created. Honestly, there’s nothing quite like the satisfaction of pulling off a perfect braise. So, grab your favorite meat cut, and let’s get cozy in the kitchen!
FAQs
What Cuts of Meat Are Best for Braising?
When I think about the best cuts for braising, I can’t help but adore beef brisket, pork shoulder, and lamb shanks.
Veal chuck’s a hidden gem too.
And let’s not forget chicken thighs—they’re juicy and tender.
Each cut brings its unique flavor.
Seriously, they practically sing when you cook ’em low and slow.
Just remember, the tougher the meat, the better it gets with time.
Who knew patience could taste so good?
Can I Braise Meat in a Slow Cooker?
Absolutely, you can braise meat in a slow cooker! It’s like the lazy chef’s best friend.
The slow cooker benefits are fantastic—low and slow cooking turns tough cuts into tender, flavorful bites.
Just brown your meat first, toss it in with some liquid, and let it work its magic.
Trust me, when you come home to that aroma, you’ll think you’ve become a culinary wizard—without even breaking a sweat.
How Long Should I Braise Meat for Optimal Tenderness?
For ideal tenderness, I usually braise meat for about 2 to 3 hours on low heat.
The key is to check the meat temperature; it should hit around 190°F for that melt-in-your-mouth magic.
I once overcooked a roast, thinking I was a culinary genius, and it turned out like shoe leather.
What Liquids Can I Use for Braising?
When I braise meat, I love using rich broth options like beef or chicken stock. They add so much depth, don’t you think?
Wine varieties, like red or white, also work wonders. Red wine gives a hearty kick, while white can brighten things up.
If you’re feeling adventurous, try adding a splash of cider or even beer. Trust me, it’s all about creating those layers of flavor. Your taste buds will thank you.
Is It Necessary to Sear Meat Before Braising?
Yes, searing meat before braising is definitely worth it. Trust me, those golden-brown crusts aren’t just for show; they bring serious flavor enhancement.
I’ve made the mistake of skipping this step. Let’s just say my stew tasted like wet cardboard. Searing locks in juices and creates that rich depth of flavor.
Plus, the aroma? Just divine. So, don’t skip it. Your taste buds will thank you later, and you’ll feel like a cooking pro.
Final Thoughts
So, there you have it—braising meat isn’t just for fancy chefs. With a little patience and a few simple steps, you can turn a tough cut into a dish that’ll make your taste buds dance. Just think about it: that tender, flavorful goodness waiting for you after a few hours of low and slow cooking. It’s like a cozy hug on a plate. Now, go on and give it a try. You won’t regret it, trust me.

